Quick start guide
The following things are needed to set up your bGeigieCast for first time use
- Fully working bGeigieNano kit
- bGeigieCast module
- A mobile phone or laptop that can connect to a WiFi access point
- A Safecast API Key
- Get your API key from api.safecast.org
- (Login -> Dashboard -> Retrieve your API key)
Important note: During the guide, you might have to restart your device some times. To do this, you can simply turn off and on the bGeigieCast with the switch, there is no need to turn off the whole bGeigieNano itself.
The module is designed to be plug and play, so simply plug on the module on the XBee socket on the bGeigieNano. If you use a BLEBee Bluetooth module, the bGeigieCast module will replace this.

(Image: bGeigieCast plugged on the bGeigieNano)
The following steps will guide you through the configuration process
Step 1 of 4: Turn on the bGeigieNano and enter configuration mode by PRESSING THE BUTTON ONCE after boot up.
Now with the module on the bGeigieNano, switch on the bGeigieNano. This will also start up the bGeigieCast (if not, use the switch to turn it on!). The LED will blink as red-blue-green multi-colour to show the module is initializing.
While the LED is blinking, press the button to enter configuration mode. This might take a few seconds if the bGeigieCast is still initializing (can take up to 10 seconds if the bGeigieNano itself was just turned on. Once initialized, the LED should change to a solid purple (red-blue) colour.
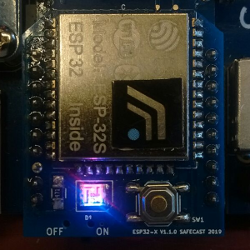
(Image: bGeigieCast purple LED, now in configuration mode)
Step 2 of 4: Connect to the module
When the bGeigieCast is in configuration mode, you can connect to it over wifi and change configurations.
Open your mobile phone or laptop and go to the list of available WiFi networks. In here, a new
network will show up with the name bgeigie1234 (where 1234 is your unique bGeigie ID).
Connect to this network, the default password is safecast.
Note: by connecting to the bGeigieCast WiFi access point, the internet connection will no longer be available on your phone/laptop while connected to the bGeigieCast.
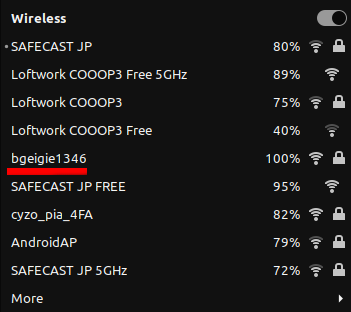
(Image: List of available WiFi networks, the bGeigieCast network marked with red)
Step 3 of 4: Configure the module for fixed mode
Open your browser and connect directly to 192.168.5.1. This page will show a landing page. From here, go to Configure -> Connection settings. Then fill in the following settings required for fixed mode:
- WiFi network name
- Your home WiFi network
- WiFi password
- Your home WiFi network password
- API Key
- API key for the Safecast API
- Safecast server
- Select Production (Use development if you want to test the connection first, or if you're in an area which generates unreliable measurements)
(optional) For more information about the settings and their description, see the User manual - available settings.
Go to step 4
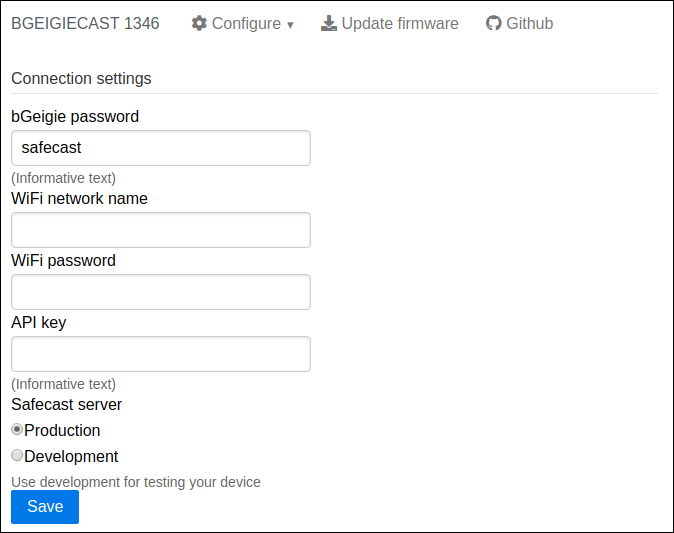
(Image: The connection settings page)
Step 4: Exit configuration mode and use the module
To exit the configuration mode (when the LED colour is red-blue / purple-ish), simply press the button once. The bGeigieCast will now enter its "active" mode, displaying either a blinking blue LED (in mobile mode) or a blinking green LED (fixed mode). For more details on the different modes, check out the User manual - using the module
Switching between fixed and mobile mode can be done by pressing the button once. Here is a quick overview of the LED meaning
- Mobile mode allows you to connect with the Safecast drive app
- Blinking blue LED: No bluetooth clients connected
- Blue LED: one or more bluetooth clients connected
- Fixed mode allows you to keep the bGeigieNano connected to the api, uploading measurements every 5 minutes
- Green blinking LED: connecting to wifi
- Green LED: connected and uploading data every 5 minutes (or 30 seconds in Developers mode)
- Red blinking LED: invalid measurements, check if GPS signal and sensor readings are correct
- Yellow LED: Safecast API (endpoint) cannot be reached (No internet connection / API down)
This step is optional, but recommended for first-time users.
To test the WiFi connection, the API key and publishing the measurements to the API, follow these steps:
- Start the bGeigieCast, wait till it's initialized and enter the fixed mode.
- The LED
- Connect to your bGeigieCast and go to the connection settings page
- Set Safecast server to Development
- Enter fixed mode
- Press the button to leave configuration mode, this will bring you to your last-used mode (default mobile mode, blue LED)
- If in mobile mode, press the button to go to fixed mode (Yellow-ish LED)
- The LED should turn green after 5 minutes (or 30 seconds if you changed the frequency)
Please check the following:
- bGeigieCast LED is Green:
- All good! You can now checkout Grafana for your measurements! (see below)
- bGeigieCast LED is blinking Green:
- Make sure you have configured your WiFi credentials correctly
- bGeigieCast LED is Red:
- Make sure the device has a GPS lock
- Make sure the sensor data looks valid (on the bGeigieNano display)
- bGeigieCast LED is Yellow (red/green):
- Make sure you have configured a valid API key
- Make sure your WiFi has a connection to the internet
- The Safecast server might be down...
- bGeigieCast LED is (blinking) Blue:
- Currently in mobile mode, press the mode button to switch to fixed mode
- Go to Safecast Grafana
- On the top left, it should say "Safecast Device Details BGeigieCasts".
- Enter your device ID in the
deviceinput field.- Your bGeigieCast ID is 6 + your bGeigieNano ID, So bGeigie id
1234would be61234as a fixed sensor!
- Your bGeigieCast ID is 6 + your bGeigieNano ID, So bGeigie id
- On the top-right, select "last 30 minutes". You should see your measurements in a graph now!
- Everything is working! You can change the configuration back to Production
Basically: You need a wireless charging dock, a wireless charging receiver attached to your device and configure the settings for the fixed mode production environment.